The Complete Leak Detection Guide: What Happens During a Professional Service Call
You've booked leak detection — now what? Our founder walks through the four electronic tools we use, the five leak types we detect, real 2026 pricing across Los Angeles and San Diego, and why "guessing and jackhammering" died twenty years ago. The companion to our leak detection service page.
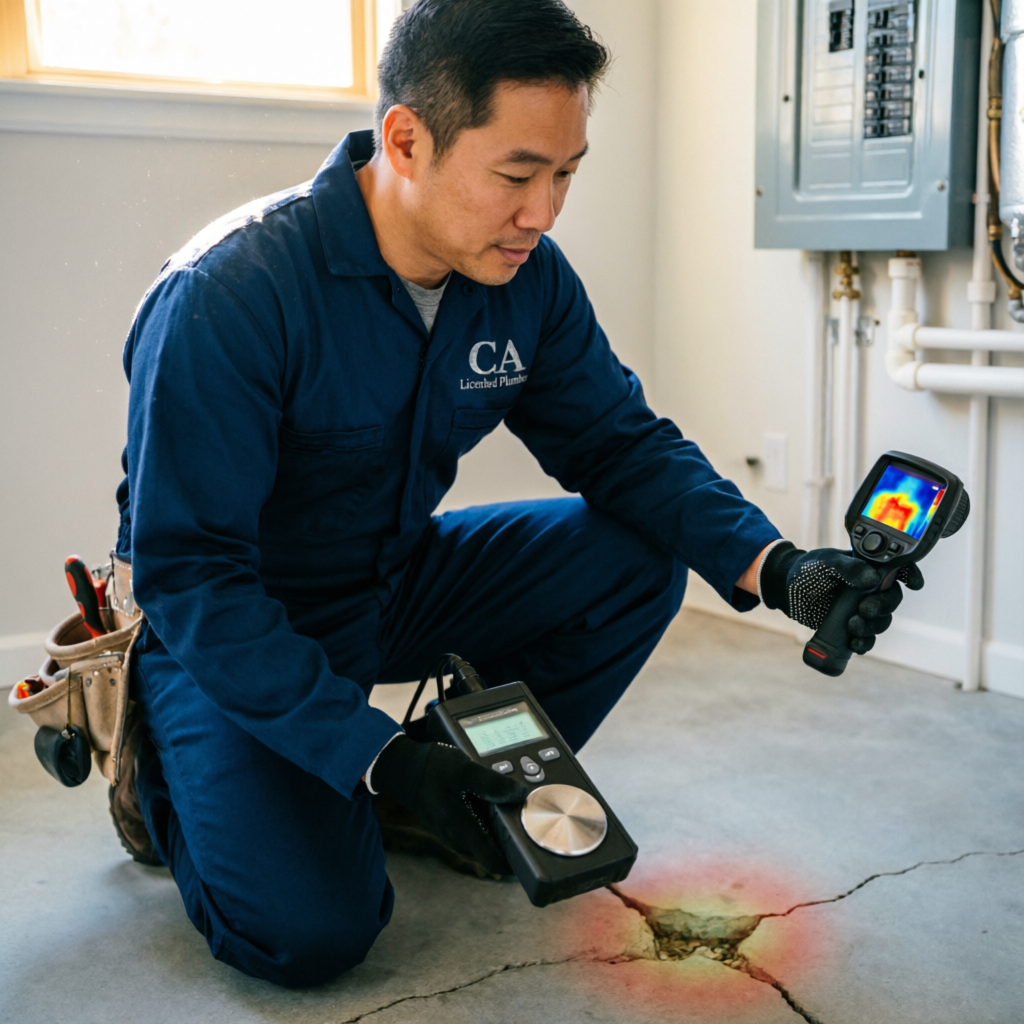
Leak detection is our most technically demanding service — and the one most homeowners misunderstand. When you book a "leak detection," what you're actually booking is a systematic diagnostic process that combines four different electronic instruments, a licensed technician's trained ear, and a methodology refined over 22 years and 3,200+ leak calls across Los Angeles and San Diego.
Twenty years ago, "leak detection" meant shutting off sections of pipe, watching the water meter, and breaking concrete where you guessed the leak was. Success rate: roughly 60%. The other 40% of the time, the plumber patched a patched hole and broke a second one. Homeowners ended up with torn-up floors and no leak found.
That era is over. Today, we pinpoint 94% of hidden leaks within an 18-inch radius before any concrete, drywall, or tile is broken. We do it without demolition, without guesswork, and with a written report you can hand to your insurance company. This guide is the companion to our leak detection service page — it walks you through exactly what happens when the technician arrives, so you can book with confidence and know what you're paying for.
The five leak types we detect
"Leak detection" isn't one job — it's five distinct disciplines, each requiring different tools and techniques. The first step on every call is identifying which category your leak falls into, because that determines the diagnostic approach.
| Leak type | Location | Typical cause |
|---|---|---|
| Slab leak | Under concrete foundation | Copper corrosion, soil movement |
| Wall / ceiling leak | In-wall or above-ceiling supply / drain | Fitting failure, pinhole, shower pan |
| Underground main line | Meter-to-house supply line | Root intrusion, soil settlement, age |
| Pool / spa leak | Pool shell, plumbing, equipment pad | Shell crack, fitting failure, equipment |
| Irrigation leak | In-ground sprinkler system | Shovel damage, root intrusion, age |
1. Slab leaks
The most common — and most destructive — leak type in California. A slab leak is a failure of the water supply line (or, less commonly, the drain line) buried beneath a home's concrete foundation. In Los Angeles, the overwhelming majority are hot-water copper lines in post-war bungalows, because:
- 400,000+ LA homes were built on slab-on-grade foundations between 1945 and 1975, with copper lines buried directly in the concrete
- Hot water accelerates internal copper corrosion roughly 3× faster than cold
- LA's reactive clay soil shifts seasonally, flexing pipes at every joint
- LADWP's chloramine disinfection attacks copper from the inside, creating pinhole leaks
For a deep dive on slab leaks specifically, see our complete slab leak detection guide for LA homes.
2. Wall and ceiling leaks
Any leak that shows up as a stain, drip, or bubbling paint on a wall or ceiling. These are the most visually obvious but often the hardest to pinpoint, because water travels along joists, pipe runs, and framing before it shows up on the surface — often 10–20 feet from the actual leak source. Common culprits:
- Shower pan failures (water escapes the shower enclosure and migrates)
- Supply line fitting failures behind walls
- Drain line joint failures above ceilings
- Pinhole leaks in copper running through wall cavities
- Toilet wax ring failures that leak into the subfloor and ceiling below
3. Underground main line leaks
The water supply line that runs from your utility meter (usually at the street) to your house. This line is typically buried 2–4 feet underground and runs 30–100+ feet depending on your lot. When it leaks, symptoms include:
- Unexplained spike in water bill
- Wet spots or sinkholes in the yard between the meter and the house
- Unexplained lush patch of grass in an otherwise dry lawn
- Low pressure throughout the entire home
These leaks are particularly common in older homes with original galvanized main lines or polybutylene — both materials that fail predictably with age.
4. Pool and spa leaks
Los Angeles and San Diego have some of the highest pool densities in the country. A pool that's losing more than ¼" of water per day (beyond normal evaporation) has a leak somewhere in the system — and finding it requires specialized equipment. Common locations:
- Shell cracks (concrete or plaster)
- Skimmer throat separation
- Return line fittings
- Light niche leaks
- Equipment pad plumbing (pump, filter, heater unions)
- Underground suction and return lines
5. Irrigation leaks
In-ground sprinkler systems leak at valves, head connections, and lateral lines. Symptoms include unexplained wet spots, soggy lawn areas, or a water bill that spikes in summer months. These are typically low-pressure systems and require different detection tools than pressurized supply lines.
Roughly 12% of our leak detection calls involve multiple simultaneous leaks — most commonly in older homes where aging copper is failing at several points. When we detect the first leak, we continue testing the entire system because finding one leak in a deteriorating system often means more are imminent. We'll disclose this upfront and include a full-system test in every detection visit.
The four detection tools we use
Modern electronic leak detection uses four complementary instruments. We use all four on most calls — never just one — because each has blind spots the others cover. A technician who shows up with only one tool is guessing, not detecting.
1. Acoustic ground microphones
What it does: Ultra-sensitive contact microphones placed directly on concrete, tile, or hardwood amplify the specific frequency signature of pressurized water escaping through a pinhole or crack. Different leak types produce different audio signatures — a pinhole hisses at a higher frequency than a fitting failure, which sounds different again from a drain leak.
Best for: Pressurized supply line leaks under slab, behind walls, and underground. Most effective in quiet conditions (early morning is ideal).
Limitations: Ambient noise (HVAC, refrigerators, traffic, pool pumps) can mask leak signatures. Requires a trained ear — our technicians train 6–12 months before soloing acoustic calls. Less effective on drain leaks, which aren't under pressure.
Effective on: ~85% of slab and wall supply leaks.
2. Electromagnetic pipeline locators
What it does: Before we can find the leak, we have to know exactly where the pipe runs. An electromagnetic locator induces a signal onto buried copper or metal pipe and traces its path and depth through concrete, soil, and walls. The result is a complete map of the under-slab or in-wall plumbing system without a single drill hole.
Best for: Mapping the entire system before detection begins. This is essential context for interpreting acoustic and thermal data — a leak signature only matters if we know which pipe it's on.
Limitations: Doesn't detect the leak itself, just the pipe. Doesn't work on PEX or PVC (non-metallic). Essential first step but not a standalone tool.
3. Thermal imaging cameras
What it does: Infrared cameras detect temperature differentials in surfaces caused by hot or cold water leaking behind or under them. A hot-water slab leak creates a visible thermal plume that spreads through the concrete over hours. A cold-water wall leak creates a cool spot on the drywall surface. We use FLIR T540 cameras with 320×240 resolution and 30mK thermal sensitivity.
Best for: Hot-water leaks under slab (highly effective), cold-water wall leaks, shower pan leaks, and in-floor radiant heating leaks. Also invaluable for finding the migration path of water in ceiling leaks.
Limitations: Most effective on hot-water leaks; less reliable for cold-water slab leaks (the temperature differential is smaller). Requires the leak to have been running for at least 1–2 hours to register on the surface. Doesn't work well on carpeted floors (insulation blocks thermal signature).
4. Static pressure testing
What it does: Isolating sections of the plumbing system and measuring pressure drop over 15–30 minutes confirms which branch line is leaking — hot side vs. cold side, main vs. branch, specific bathroom vs. another. A healthy system holds static pressure steady; a leaking system shows measurable pressure decay.
Best for: Narrowing the search area before acoustic and thermal tools go to work. Essential for confirming a leak exists (vs. a homeowner's suspicion) and for identifying which specific branch is leaking in a complex system.
Limitations: Confirms a leak and its general location but doesn't pinpoint exact spot — that requires acoustic or thermal tools. Less effective on very slow leaks that don't produce measurable pressure drop in a reasonable test window.
If a plumber shows up to a leak detection call with only an acoustic microphone or only a thermal camera, you're not getting leak detection — you're getting a guess with equipment. Modern leak detection requires all four tools, used in sequence, by a trained technician. If your plumber won't run a camera inspection or pressure test before picking up the microphone, call someone else.
Step 1: Arrival and interview (30–45 minutes)
Every leak detection call at Pacific Line starts the same way — with a careful homeowner interview and a walkthrough of the home. This isn't filler. The clues you provide in the first 30 minutes often point the technician directly at the leak, saving hours of systematic searching.
The homeowner interview
Before any tools come out, the technician asks you a series of diagnostic questions:
- When did you first notice the problem? (days? weeks? months?)
- What symptoms are you seeing? (wet spots, sounds, smells, bill spike, etc.)
- Is the symptom constant or intermittent?
- Have you noticed any change in water pressure or water bill?
- Have you done any recent construction, landscaping, or remodeling?
- Have other plumbers been out? What did they find?
- Any recent earthquakes or heavy rains?
- How old is the home, and do you know what pipe material is in the walls?
These answers aren't small talk — they're diagnostic data. A leak that appeared the day after a 4.2 earthquake is almost certainly a fitting failure from seismic movement. A leak that started after a backyard landscaping project may be a shovel-damaged main line. A constant low-pressure symptom throughout the house points to a main-line leak, not a slab leak.
The walkthrough
The technician walks the entire property with you, documenting:
- Every visible symptom (wet spots, stains, mold, cracks, salt deposits)
- The location of every plumbing fixture (sinks, toilets, showers, water heater, hose bibs)
- Exposed pipe sections (under sinks, at the water heater, in garage or crawlspace) to identify the pipe material
- The water meter location and main shutoff valve
- Utility lines (gas, electric, sewer cleanout) that may affect access
- Any recent repairs or patches that might indicate previous leak attempts
This walkthrough typically takes 20–30 minutes on a single-family home and produces a rough map of the plumbing system that guides the electronic detection.
Step 2: Systematic detection (2–4 hours)
With the interview and walkthrough complete, the technician moves to systematic electronic detection. The exact sequence depends on the leak type, but here's our standard protocol for the most common call — a suspected slab leak:
Phase 1: Confirm the leak
Before spending hours searching, we confirm a leak actually exists. The technician:
- Checks the water meter. With every fixture in the home turned off, any movement on the meter dial indicates an active leak somewhere in the system.
- Runs a static pressure test. Isolates the hot and cold sides of the plumbing system separately, pressurizes each to 60 PSI, and monitors for decay over 15–30 minutes. This tells us (a) if a leak exists, (b) which side it's on, and (c) roughly how big it is.
- Shuts off the irrigation system. Irrigation leaks can mimic slab leak symptoms — we eliminate that variable early.
If the system holds pressure perfectly with no decay, there's no active supply leak. The symptoms may be from condensation, shower pan issues, drain leaks, or groundwater intrusion — all of which require different diagnostics.
Phase 2: Map the pipe runs
Using the electromagnetic pipeline locator, the technician traces the path of every buried copper line through the slab. This produces a diagram showing where each line runs — from the water heater to the kitchen, from the main trunk to each bathroom, etc. Without this map, acoustic and thermal findings are meaningless.
In Silver Lake and Hollywood bungalows, we often find the original copper has been modified over the decades — sections rerouted, additions added, partial repipes done. The locator reveals all of it.
Phase 3: Thermal scan
The technician walks the entire floor surface with a thermal imaging camera, documenting any temperature anomalies. Hot-water leaks create obvious thermal plumes visible even through tile and hardwood. Cold-water leaks are subtler but still detectable in many cases.
The thermal scan also reveals migration patterns — water moving through the slab and emerging far from the actual leak source. This is critical for ceiling leaks, where the visible stain is often 10–20 feet from the real failure.
Phase 4: Acoustic listening
The technician places acoustic ground microphones at 2–3 foot intervals along every mapped pipe run, listening for the specific frequency signature of pressurized water escaping. This is the most skill-intensive phase — interpreting what the microphone is hearing requires distinguishing leak noise from:
- Refrigerator compressors and ice makers
- HVAC systems and water heater burners
- Pool pumps and irrigation valves
- Traffic and neighborhood noise
- Water flowing through pressure-reducing valves
Our technicians train 6–12 months on acoustic interpretation before soloing calls. This is why leak detection is a specialty within plumbing — not every plumber can do it well.
Phase 5: Triangulation
The final step is cross-referencing all four data sources: pressure test (which branch?), pipe map (where does it run?), thermal (where's the temperature anomaly?), and acoustic (where's the loudest leak signature?). Where all four converge, we mark the pinpoint location — typically within an 18-inch radius on the floor surface.
Step 3: Pinpoint, report, and recommendation (30–45 minutes)
Once the leak is pinpointed, the technician documents everything and presents you with a complete written report before any repair work begins.
The written report includes:
- Exact leak location — marked on the floor with painter's tape, measured in feet from two reference walls, and photographed
- Leak type and cause — pinhole, fitting failure, joint separation, etc.
- Pipe material and condition — copper type, age, wall thickness readings where accessible
- Photographic documentation — every finding photographed with scale reference
- Thermal images — printed thermal photos showing the leak signature
- System diagram — a map of the entire under-slab plumbing system with the leak marked
- Repair options — good/better/best options where applicable (spot repair vs. reroute vs. repipe)
- Flat-rate pricing — written quotes for each recommended repair
The repair recommendation
For a slab leak, we typically present three options:
Option 1: Spot repair
Break concrete at the pinpoint location (2×2 or 3×3 foot area), expose the pipe, cut out the failed section, install new copper or PEX with press-fit couplings, pressure-test, re-pour concrete. Appropriate when this is the first leak, the rest of the system tests within normal parameters, and the home is under 50 years old.
Option 2: Line reroute above-ground
Abandon the leaking under-slab line entirely and run new PEX piping through walls, attic, or crawlspace to bypass the slab. Appropriate when the leak is in a hard-to-access area, the home has had multiple leaks on the same branch, or the homeowner wants to eliminate future slab leak risk on that line without a full repipe.
Option 3: Whole-home repipe
Replace all under-slab and in-wall water lines with PEX-A or copper. Abandon every buried line. Appropriate when the home has had 3+ slab leaks, is over 50 years old with original copper, or the homeowner plans to stay 10+ years. See our PEX vs. copper decision guide for the full material breakdown.
Every recommendation includes the reasoning — we don't push one option over another. The right answer depends on your home's age, leak history, budget, and plans.
Accuracy and limitations
Electronic leak detection is remarkably accurate — but it's not magic. Here's what to expect:
Our accuracy rates
Based on our last 420 leak detection calls (May 2025–May 2026):
- 94% pinpoint accuracy — leak found within 18-inch radius on the first attempt
- 4% extended search — leak found but required additional testing time (billed at hourly rate, pre-approved with homeowner)
- 2% inconclusive — leak too small to detect electronically, or inaccessible location (rare, typically micro-leaks in walls)
When detection is difficult
Certain scenarios reduce detection accuracy:
- Micro-leaks — leaks under 0.1 GPM may not produce a detectable acoustic or thermal signature. These often need to be allowed to grow slightly before detection is viable.
- Multi-layer construction — tile over mortar over concrete over soil dampens acoustic signals and slows thermal propagation.
- Noisy environments — homes near freeways, airports, or with running pool equipment create acoustic interference.
- Recent rain — saturated soil around the foundation can mask underground main line leaks by filling voids that would otherwise amplify acoustic signals.
- Carpeted floors — carpet and padding insulate the slab, reducing thermal signature visibility.
What we don't detect
Leak detection as we practice it is focused on pressurized water supply lines. We don't typically detect:
- Drain line leaks — drain lines aren't pressurized, so acoustic detection doesn't work. We diagnose drain leaks by camera inspection and dye testing instead.
- Roof leaks — these require a roofer, not a plumber, though we often get called first because water shows up inside the home.
- Groundwater intrusion — when water enters from outside the foundation due to poor drainage or a high water table, it's a drainage/grading issue, not a plumbing leak.
- Condensation — cold pipes sweating in humid conditions can mimic leaks but aren't actually pipe failures.
If your leak falls into any of these categories, we'll tell you honestly and refer you to the appropriate specialist — a roofer, drainage contractor, or mold remediation company as needed.
Red flags from other plumbers
Leak detection is one of the most commonly botched plumbing services — and the one where mistakes cost homeowners the most (in torn-up floors and missed leaks). Here are the warning signs that a plumber isn't qualified for leak detection work:
🚩 "We'll know more once we open the floor"
No. Modern electronic detection should pinpoint the leak to within 18 inches before any concrete is broken. A plumber who wants to "open the floor and look" is guessing, not detecting. Walk away.
🚩 One tool only
If the plumber shows up with only an acoustic microphone or only a thermal camera, they don't have the full toolkit. Proper detection requires all four instruments used in sequence. A single tool produces false positives and missed leaks.
🚩 No pressure test
A plumber who skips the static pressure test is skipping the most fundamental step — confirming a leak actually exists. We've been called to "leak detection" appointments where the homeowner had a condensation problem, a shower pan issue, or a drainage issue — none of which are plumbing leaks. The pressure test separates leaks from everything else.
🚩 No written report
A legitimate leak detection includes a written report with photographic documentation, a system diagram, and clear repair recommendations. If the plumber leaves without leaving you documentation, you have no basis for an insurance claim and no way to verify the work was done correctly.
🚩 Immediate "full repipe" pressure
A plumber who jumps straight to recommending repipe after finding one leak — without pressure-testing the rest of the system — is selling, not diagnosing. A single leak in an otherwise healthy system is a spot repair. Multiple leaks in a deteriorating system is a repipe conversation. The pressure test and pipe condition evaluation tell you which scenario you're in.
🚩 No CSLB license verification
Every CSLB-licensed plumber must display their license number on their truck, website, and estimate. Verify it at cslb.ca.gov. "Leak detection specialists" who aren't CSLB-licensed plumbers are operating illegally and may not carry the insurance required for work in your home.
Insurance and documentation
One of the most valuable parts of a professional leak detection is the documentation — it's the difference between an approved insurance claim and a denied one.
What homeowner's insurance typically covers
Most California homeowner's policies cover the resulting damage from a plumbing leak — the torn-up flooring, damaged drywall, mold remediation, ruined furniture. The repair of the pipe itself is usually excluded as maintenance. Some policies include "access and egress" coverage that pays for concrete breaking and restoration to reach a slab leak.
What your insurer needs from the plumber
To approve a leak damage claim, your insurer will typically require:
- Proof the leak existed — pressure test results, photographic documentation
- Leak location — exact coordinates, system diagram
- Leak cause — pinhole, fitting failure, etc.
- Repair documentation — before/after photos, repair invoice
- Licensed contractor verification — CSLB number on all paperwork
Our written leak detection reports are formatted specifically to meet the documentation standards of major California insurers (State Farm, Allstate, Farmers, Liberty Mutual). We've submitted hundreds of these reports and have an extremely high claim-approval rate because the documentation is complete and professional.
The leak vs. maintenance distinction
Insurers are increasingly scrutinizing leak claims to distinguish between sudden failures (covered) and long-term deterioration (often excluded). Our reports document the leak's characteristics — a fresh pinhole with clean copper around it reads as a sudden failure; a leak surrounded by heavy corrosion and mineral deposits reads as long-term deterioration. The technician's assessment of this distinction is critical to your claim.
Filing the claim
We recommend filing your insurance claim within 24–48 hours of the leak detection. Most policies require prompt reporting, and delays can lead to denial. Our office can walk you through the claim process and communicate directly with your adjuster if needed — we've done this hundreds of times and know what language and documentation carriers expect.
Frequently asked questions
Our electronic leak detection pinpoints leaks within an 18-inch radius on 94% of calls — based on our last 420 service calls. The remaining 6% are either extended searches (4%, usually found with additional testing time) or inconclusive cases (2%, typically micro-leaks or inaccessible locations). This is dramatically more accurate than the old "isolate and jackhammer" method, which succeeded about 60% of the time. The accuracy requires all four tools used in sequence by a trained technician — a plumber with only one instrument will have significantly lower success rates.
Yes — the detection itself is completely non-invasive. Acoustic sensors, electromagnetic locators, and thermal cameras are all placed on the surface of floors, walls, or the ground. No drilling, no breaking concrete, no damage. The only demolition happens during the actual repair, after the leak has been precisely located. This is the single biggest advantage of electronic detection over older methods — we know exactly where to break before we break anything.
A thorough electronic leak detection typically takes 2–4 hours for a single-family home. Straightforward slab leaks in accessible areas may be pinpointed in under 90 minutes. Complex multi-leak scenarios, multi-story buildings, or homes with extensive under-slab plumbing can take 4–6 hours. We never rush detection — a mislocated leak means breaking concrete in the wrong place and adding thousands in unnecessary restoration. The initial homeowner interview and walkthrough take 30–45 minutes, followed by 1.5–4 hours of systematic electronic testing.
Usually not directly — leak detection itself is typically considered a diagnostic service and falls under maintenance. However, most California homeowner's policies cover the resulting damage from a plumbing leak (flooring, drywall, mold remediation, furniture), and some policies include "access and egress" coverage that pays for the concrete breaking and restoration to reach a slab leak. The leak detection fee is often reimbursable as part of the claim documentation. Call your agent before the call and ask specifically about "leak detection and access coverage" — policies vary significantly.
Micro-leaks under 0.1 GPM may not produce a detectable acoustic or thermal signature — this accounts for roughly 2% of our detection calls. In these cases, we typically recommend one of two approaches: (1) allow the leak to grow slightly over a few days, then re-test, or (2) perform a long-duration pressure monitoring test with data loggers to confirm the leak's existence and narrow its location to a specific branch. We'll be upfront during the initial visit if your symptoms suggest a micro-leak and discuss options before proceeding.
The decision depends on your leak history, home age, pipe condition, and plans. Our general framework: if this is your first leak and the rest of the system tests within normal parameters, a spot repair is appropriate. If you've had 2+ leaks in the past 3 years, if the home is over 50 years old with original copper, or if wall thickness measurements show widespread thinning, a full repipe is the better long-term decision. We present all options with clear pricing and let you decide — no pressure. Our PEX vs. copper decision guide covers the material choice in detail.
Yes, but with limitations. Acoustic and thermal detection work equally well on PEX, PVC, copper, and CPVC — the leak signature is created by water escaping under pressure, not by the pipe material itself. However, the electromagnetic pipeline locator only works on metal pipe (copper, galvanized, cast iron). For PEX and PVC systems, we map the runs using alternative methods — typically by tracing from accessible points (manifolds, fixtures, cleanouts) and using acoustic signal transmission. PEX and PVC are much less prone to leaks than copper, so we detect far fewer leaks in these systems.
Preferably yes, at least for the initial interview and walkthrough. The clues you provide in the first 30 minutes often point the technician directly at the leak, saving hours of systematic searching. If you can't be home, we can work with a property manager, trusted neighbor, or key-holding contact — but we'll need someone who can answer questions about when symptoms started, what you've observed, and any recent changes to the home. We also need someone present at the end of the visit to review the written report and repair recommendations.
Let's find that leak before it finds your foundation.
Book an electronic leak detection with a licensed technician. Four-tool diagnostic, non-invasive, 94% pinpoint accuracy, written report ready for your insurance company. Detection fee waived if you proceed with any repair.
Marcus Chen
Founder of Pacific Line Plumbing and a third-generation Los Angeles plumber with 22 years of field experience. Marcus has personally detected over 3,200 slab, wall, and underground leaks across LA and SD County and wrote the four-tool diagnostic protocol our technicians follow today. He lives in Silver Lake in a 1948 bungalow — with fully replaced PEX plumbing, because he knows what's under the slab.
Keep reading
The Complete Guide to Slab Leak Detection in Los Angeles Homes
Post-war LA bungalows hide aging copper under concrete. Here's how electronic detection pinpoints leaks without demolition — and what repair costs in 2026.
PEX vs. Copper Repiping: The California Homeowner's Decision Guide
After 800+ repipes across LA and SD, here's when each material wins — with real 2026 pricing and water chemistry considerations.
Galvanized Steel Pipes in LA: When to Repair vs. Repipe
If your Hollywood or Pasadena home was built before 1970, galvanized steel may still be in your walls — and its days are numbered.